Shop Certified Tiny But Mighty Gear™
Compact Photography Gear That Delivers Big Results
Welcome to Certified Tiny But Mighty Gear™ — a curated collection of compact photography gear and portable photography tools that I, Vail Fucci, the Headshot Doctor, personally use on real client shoots.
Everything here is NOT made by Tiny But Mighty Gear. But everything here has earned my certification by proving it can deliver professional results while staying lightweight, efficient, and easy to carry.
If you’re searching for the best lightweight photography gear that actually performs under pressure, you’re in the right place.
What Is Certified Tiny But Mighty Gear™?
Certified Tiny But Mighty Gear™ is my stamp of approval for small photography gear that packs a big punch.
Every item on this page meets strict real-world criteria:
- Compact & Portable – Designed for photographers who work on location
- Lightweight Without Compromise – Professional results without heavy setups
- High-Performance – Reliable enough for professional on-location work
- Efficient & Fast – Saves time, space, and energy
- Bag-Worthy – Earns its place in a minimalist photography kit
If a tool doesn’t improve my workflow, it doesn’t get certified.
Why Compact Photography Gear Matters
Bigger gear doesn’t automatically mean better results. After years of shooting high-volume headshots, weddings, and fast-paced corporate events, I’ve learned that portable photography tools consistently outperform bulky setups when it comes to:
- Speed on location
- Ease of transport
- Client experience
- Setup and breakdown time
- Creative flexibility
The best photographers don’t carry the most gear — they carry the right gear.
Hand-Selected Portable Photography Tools I Actually Use
Every product in the Certified Tiny But Mighty™ collection is:
- Used by me personally
- Tested on real assignments
- Chosen for efficiency, not hype
This is lightweight photography equipment that works just as hard as you do — whether you’re shooting corporate headshots, events, weddings, or personal branding sessions.
No sponsored fluff I’ve only tried once. Just tools that deliver consistent results.
The Best Lightweight Photography Gear for Photographers Who Work Smarter
Explore the Certified Tiny But Mighty Gear™ collection to find portable photography tools that help you move faster, work lighter, and deliver exceptional results — without compromising quality.
Camera Bodies:
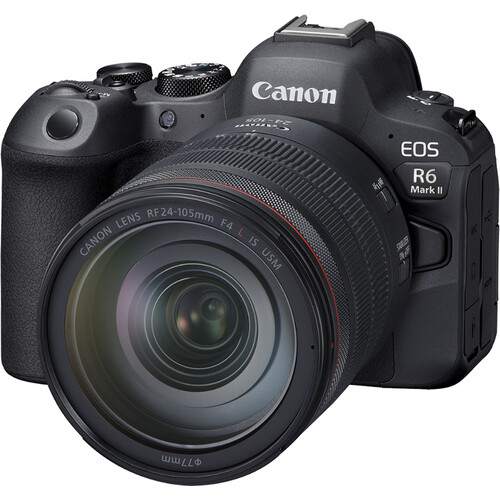
Canon R6MKII: I adore these cameras! The R6MKII is an amazing full frame mirrorless camera at a reasonable price. It has the same game changing eye tracking and in body image stabilization that the R5 does. It has 2 SD slots so I am able to continue to use my old SD memory cards. I did not need 8K video capabilities that he R5 has, 4K is more than enough for me. The low light performance of the R6 series is phenomenal. I didn’t need the extra megapixels (and weight) the R5 series has for most of my day to day work.
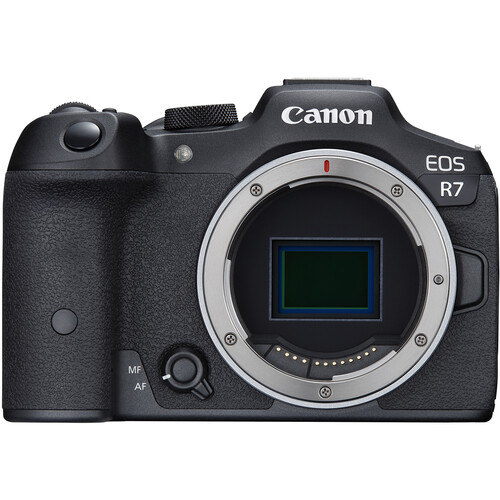
Canon R7: I have two of these. One for me and one for my second shooter. I added the Canon R7 to my lineup for three reasons. 1) It is a crop body sensor. When I am shooting events sometimes 200mm just isn’t long enough. But if I throw the 70-200 on the R7 now I have the equivalent of up to 320mm lens in my bag without having to bring an extra giant lens with me. 2) It was about $1000 less than the R6mkII at the time and I wanted to have my second shooter have a backup body. 3) It is super light!
Lenses:
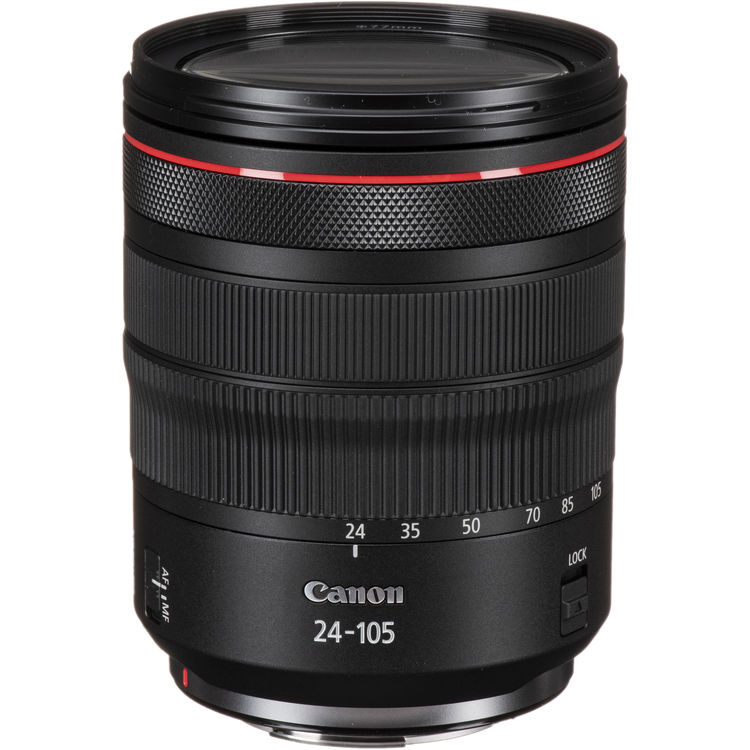
Canon RF 24-105 f/4.0L IS: This is a great all around lens that is my workhorse. I use it for just about EVERYTHING. It allows me move seamlessly from shooting headshots to portraits. I also like to use it for corporate event photography. It has such an incredibly wide focal length range and weighs a fraction of it’s big 2.8 brother.
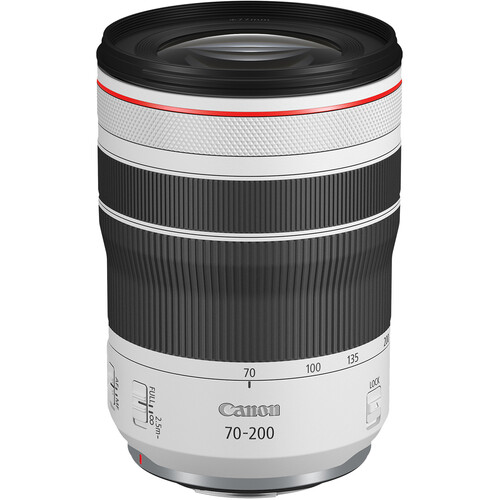
Canon RF 70-200 f/4: Before I got the 24-105, the EF 2.8 version of this lens was the lens that got the most use in my bag. I used it for headshots. I used it for product shots. I used it for first looks and first dances. I LOVED THIS LENS! When I first started out in wedding photography this lens was too heavy for me to hand hold for long periods of time so I used the Canon 135mm prime which is much lighter. Because I no longer need my lens to go all the way down to 2.8 I choose the lighter the 70-200 f/4L which is considerably lighter and less expensive. This is mostly used for speaker shots at conferences now.
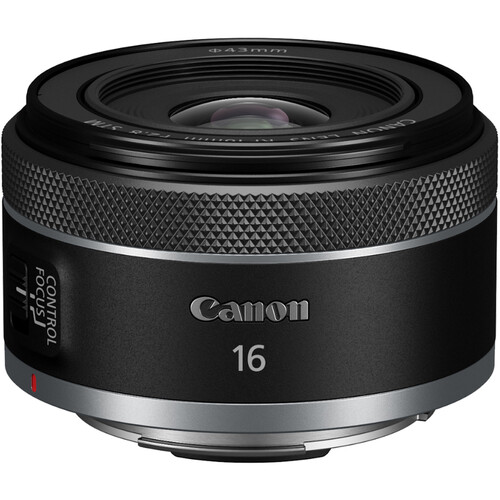
Ultra Wide Lens Choices: The Canon EF 16-35 f/2.8L USM was my go to lens for dance floor receptions at weddings and audience shots at corporate events. Its field of view is HUGE! But then I realized, if I am needing a wide angle lens most of the time I need it for the 16mm focal length. The 16-35 EF lens with RF adapter took up a lot of space and WEIGHT in my bag. So I decided to get the Canon RF 16mm 2.8. It is TINY! I pack it with me for every event I shoot now and don’t have to give a second thought about the space or weight it will take up in my bag. I also got it for video shoots when using my RS2 gimbal.
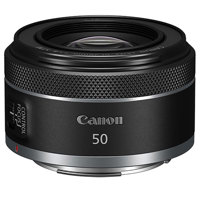
Canon RF 50mm f/1.8L: In super low light this is the lens to use with its wide open f/1.8 maximum aperture. The classic nifty 50 is perfect when shooting video on a gimbal and you don’t want your arms getting tired with a heavy rig and for getting that super creamy background bokeh blur.
Lighting:
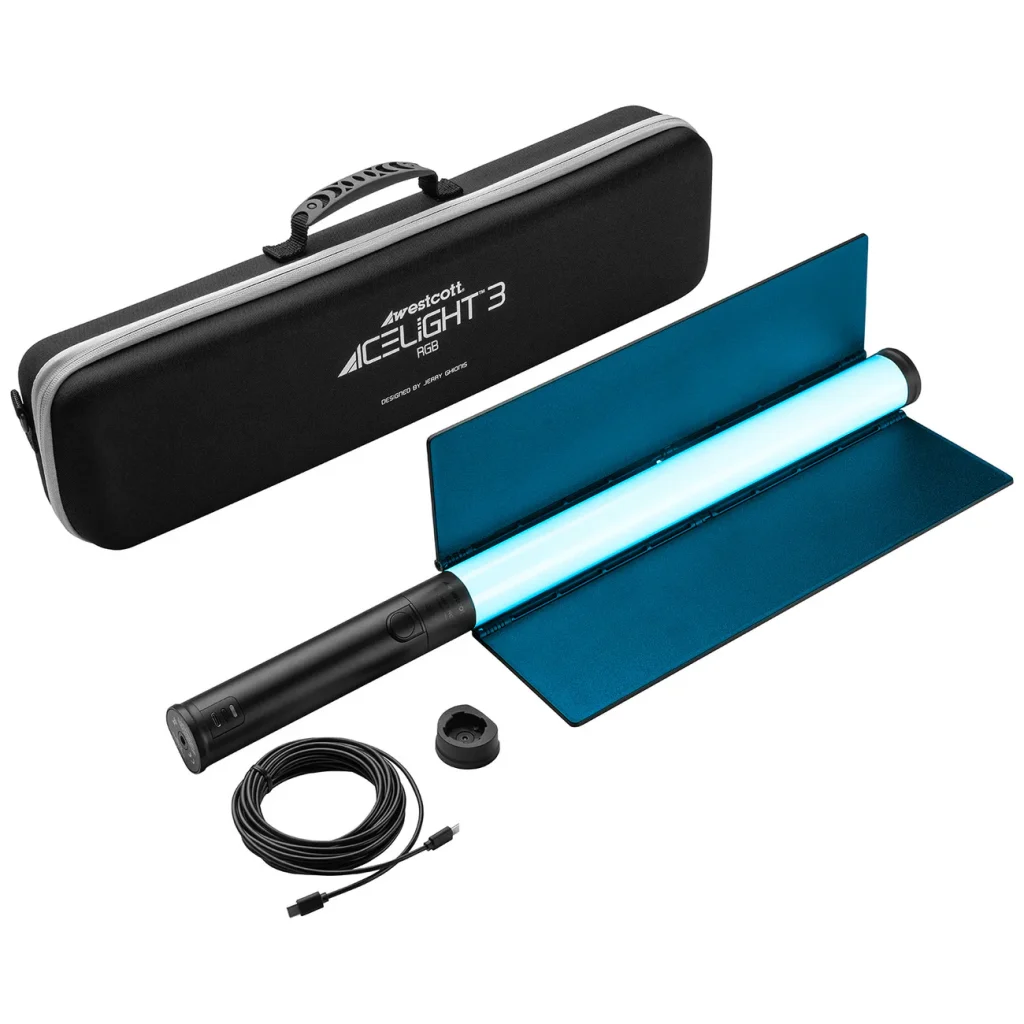
Westcott RGB Ice Light 3: The ice lights are my go to on-location lighting for headshots and for dramatic portraits. I adore the ice lights because they are so compact and are so light. I switched to using them for on location headshots because trekking around with my studio kit was getting too heavy for me (and my suitcase). I highly recommend buying a second battery for each ice light you get. Luckily the case even has a dedicated space for an extra battery as well. That way if you are doing a long shoot when the battery runs low on the one battery you can switch it to the second one and charge up the first one. Additionally you can power the lights with the included long USB-C cord.
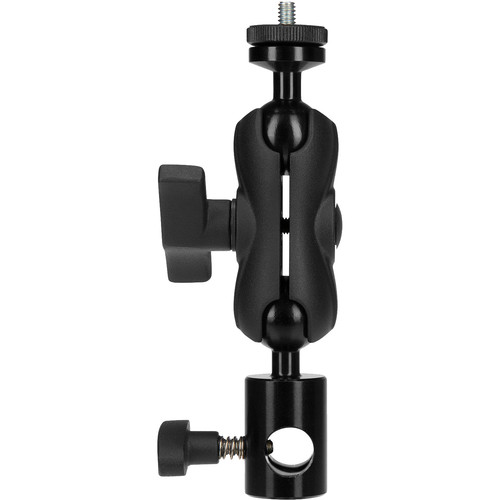
The last pieces I recommend getting are the Westcott dual-joint tilter bracket and anti-twist tilter bracket . This also fits really nicely into the case and allows you to tilt the lights nearly 360 degrees. To do headshots I recommend you have at least 2 of dual-joint tilters and 1 anti-twist tilter bracket so you can easily do triangle lighting or key fill kick lighting. In addition to the ice light itself, here are things I highly recommend buying along with it: an extra battery for the ice lights. So that you can get the lower part of the triangle or clamshell lighting nice and low check out the compact light stand. If you are doing triangle style lighting, the anti-twist tilter brackets are best used for the bottom part of triangle lighting. For the upper portions of triangle lighting you could use either type. If you are doing clam shell type lighting, you can create a mini boom by using the dual joint tilter bracket put at a 90 degree angle and screwed into the bottom of the battery. Just be sure to weigh down your light stand. I use the H2Pro bags from Westcott so that I don’t have to lug heavy sandbags or weights with me. I just fill them with water when I get there.
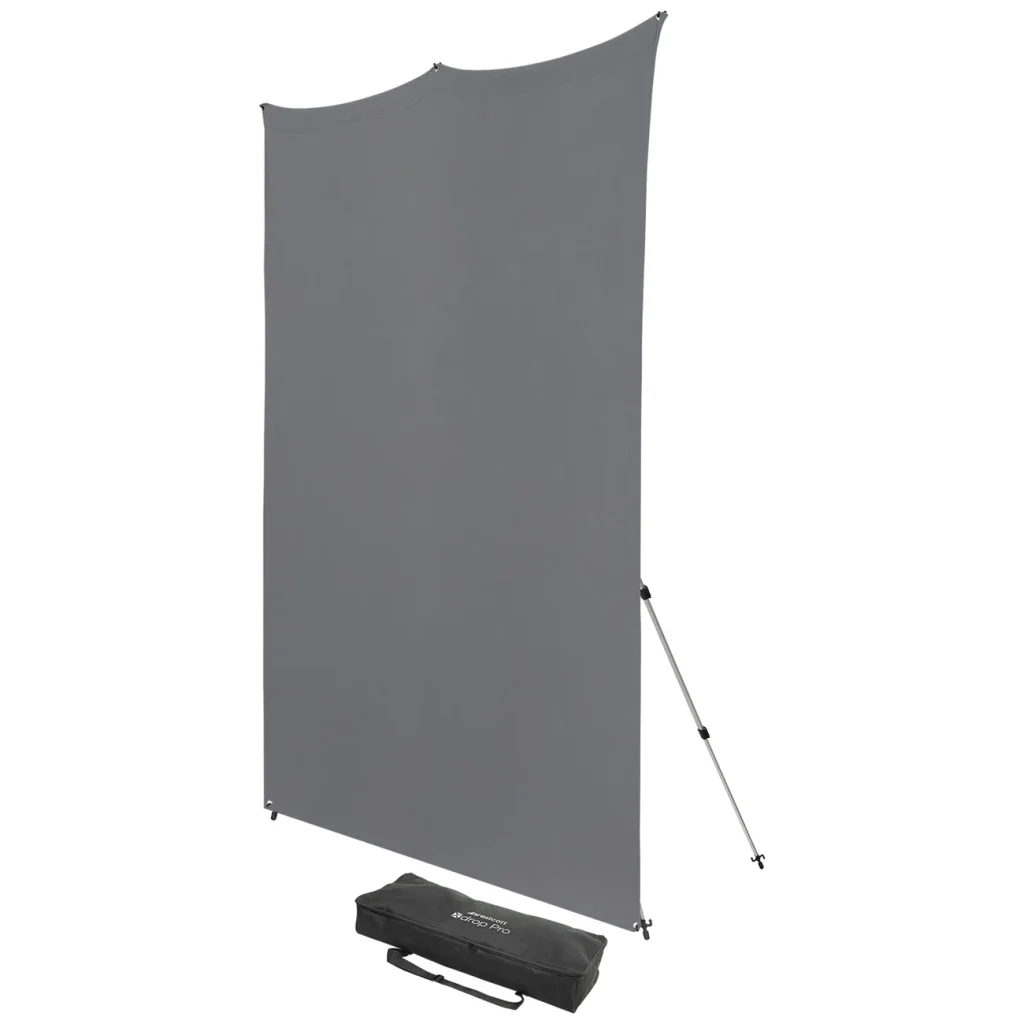
Whether I am shooting on-location or in the studio, the X-Drop Pro Backdrop stand stand is what I am using. It is lightweight yet durable. When I am shooting on location I typically bring both the white and neutral gray. I put the neutral gray on first and then the white on top of it. That way if there is any light behind the stand, the struts of the stand won’t show through. If I don’t light the background, the white will fall off to a nice gray. Printed designs and colors I love are blush (you can change the white balance of your ice light to warm or cool the background so it subtly matches the color of your subject’s lips), tiger orange, parchment paper, and grunge concrete.
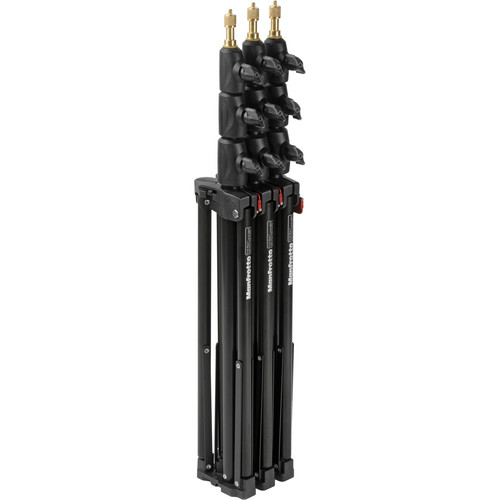
Stacking travel light stands: I have three 7′ stacking light stands from Manfrotto. They fit perfectly into my hard sided suitcase that I bring the travel flex kit in for off site shoots.
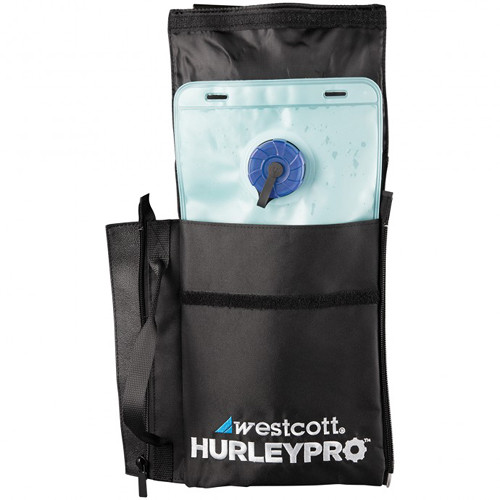
Fillable water weight bags: When I don’t have access to bottles or cans of fluid on a site, I use these Westcott HurleyPro H2Pro Weight Bags that allow me to just go and fill them up with water at any sink.
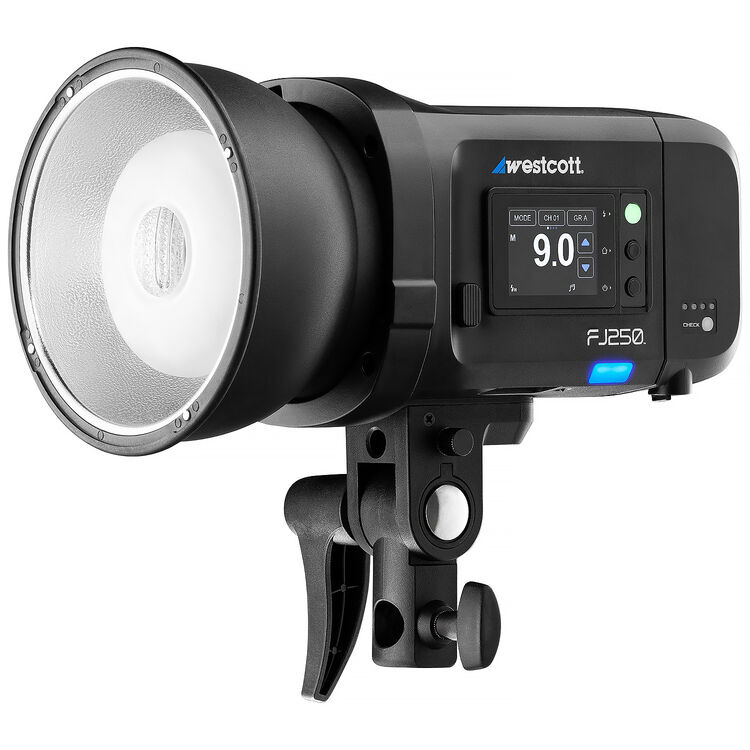
Westcott FJ250 Strobe Kit: This kit has everything you need to make the FJ250 the powerhouse you’ve heard about. It has the FJ250 that is a native bowens mount, a reflector, and a fixed bracket mount. I originally started out with Godox strobes, but I switched over to all Westcott lights after experiencing the all too common battery issue that is part and parcel of using Godox lights. I had many a battery not get used for a month and then it wouldn’t ever hold a charge again. That isn’t the case with Westcott batteries. I once didn’t use a Westcott battery for a full year and it still held its charge! After that I said goodbye to all my godox gear. They come in a compact little case so whenever I go on off site headshot gigs I pack 3 of them with me and some umbrellas just in case there is so much ambient light that shooting with the IceLights isn’t a good choice, I have them as a great backup.
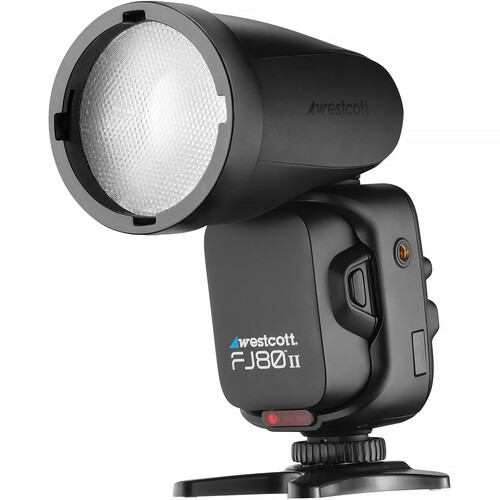
Westcott FJ80 II M Universal Touchscreen 80Ws Speedlight: I use these little work horses for my event photography work mainly as on-camera flashes but also use them as transmitters and sometimes as off camera flash. Offering more power than ever, the recently updated FJ80 II M Universal Touchscreen 80Ws Speedlight from Westcott f eatures a 2.8″ LCD touchscreen, multi-camera TTL compatibility, and a rechargeable battery that will give you 500+ full-power flashes. The FJ80 II also offers an incredible 9-stop power range in 0.1-stop and 1-stop increments, recycles in 0.05 to 1.5 seconds, and is capable of a blazingly fast 20 fps. It also supports High-Speed Sync up to 1/8000 second as well as front and rear curtain sync. One of the speedlight’s unique features is its multi-brand TTL compatibility. The flash is compatible with most Canon, Nikon, Sony (with adapter), FUJIFILM, Panasonic Lumix, and Olympus cameras, and with its integrated 2.4 GHz transceiver, you can use the FJ80 II on-camera as both a flash and transmitter. You can control FJ800, FJ400II and FJ200 strobes, FJ-XR receivers, off-camera FJ80-series speedlights devices directly from the hot shoe.
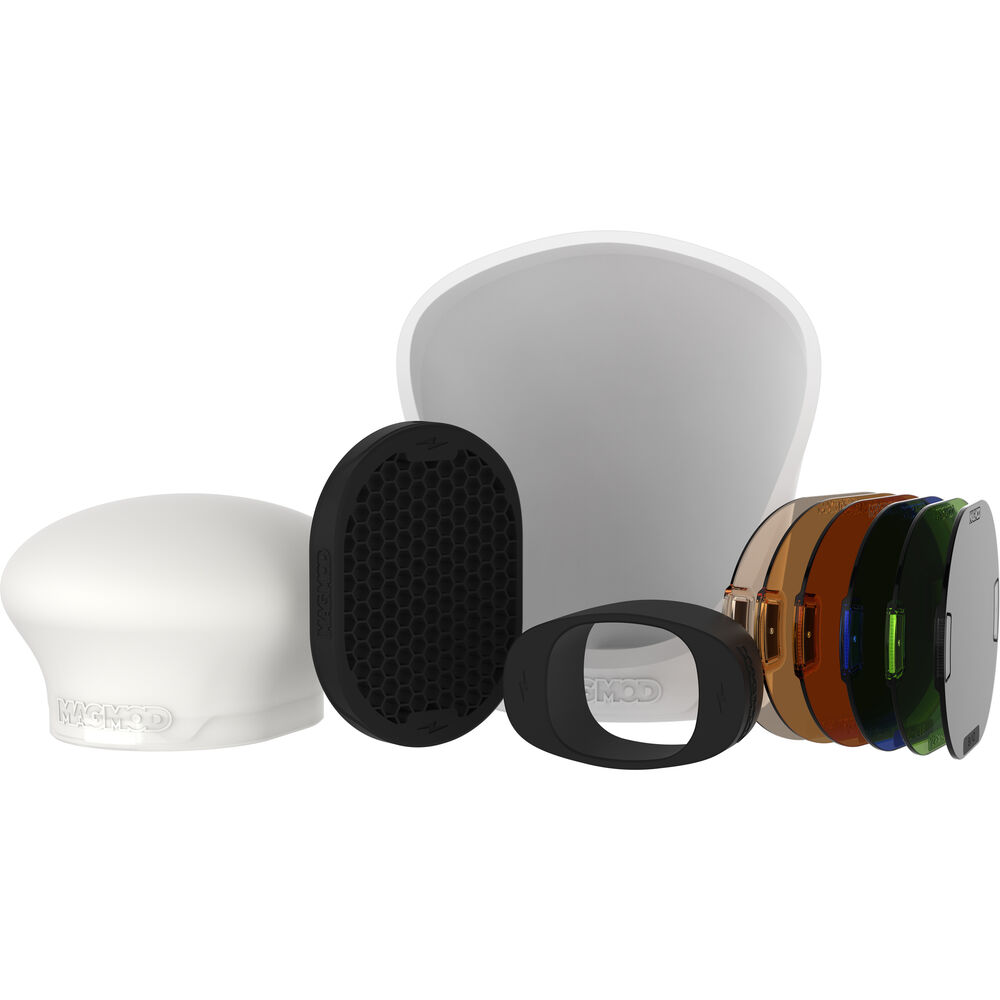
MagMod Professional Flash Kit 2: I have jumped on the MagMod bandwagon. It really is a brilliant invention that works so well. It is expensive but worth it. It collapses down to just about nothing in my bag and the light quality that comes out of the sphere is OUTSTANDING!
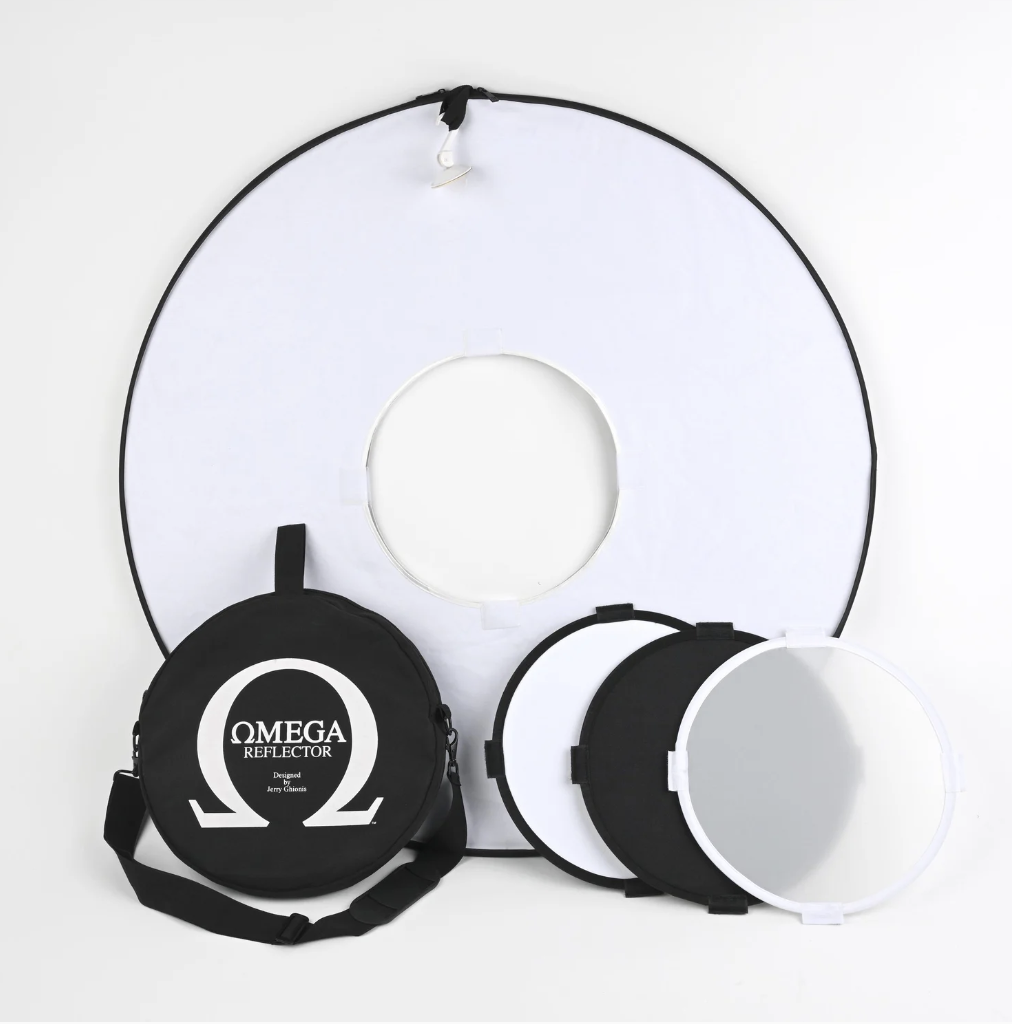
The Omega Reflector is the world’s first 15-in-1 shoot through reflector. It’s the last reflector you will ever need! Designed by Jerry Ghionis (yes the same awesome Aussie who invented the IceLights). Boy do I wish this this existed back when I was shooting weddings! It has really cool applications for natural light work, but also amazing studio uses too! The shoot through design makes it work like a dream. You can get it super close to your subject, and as we all know the closer your light source is to your subject, the softer the light!
Tethering Setup:
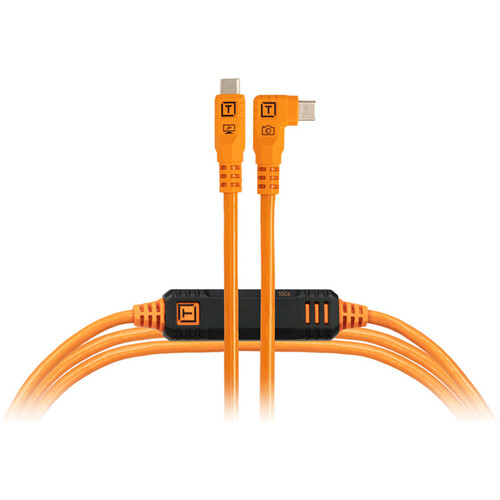
Tether Tools TetherPro Optima USB-C Cable (15′, High-Visibility Orange, Right-Angle): for super reliable tethering I use Tether Tools cables. If you have a Canon mirrorless camera splurge and get this model to avoid your camera using your laptop as a battery charger. I prefer the high-vis orange color to decrease the chances of people tripping on them.

16″ Macbook Pro M4 Max: I choose the 16″ version so that when I am shooting on location I have the largest screen possible for clients to be able to review their images with. AI generated content takes lots of processing power so I went with the I went with a M4 Max with a 8TB SSD and 64GB of RAM. It is a BEAST!
Video Accessories:
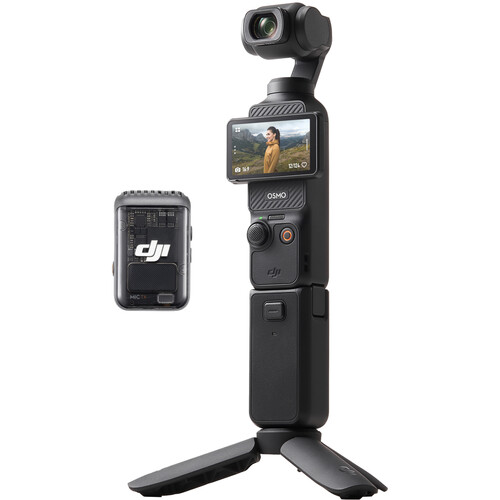
DJI Osmo Pocket 3 Creator Combo: This is what I use for much of my filming on location. I have found it much easier to use than the Ronin Gimbal and it is SO TINY. It legitimately fits into my pocket and the quality of the video is outstanding. For an idea of how I use it check out my B&H event space talk on BTS videos.
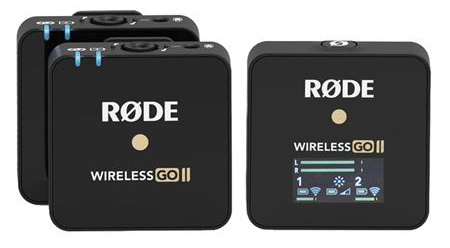
Rode Microphones Wireless GO II Compact Microphone System with 2x Transmitters and 1x Receiver: When I am doing my videos for youtube I capture the audio using one of these little guys. They are super simple to use. The transmitters even have internal memory and record what you are saying as well as the receiver laying down the audio track on your camera footage, this is great if you want to record audio without even using your camera.

Rode Lavalier Go: To get even clearer sound and so I don’t have a big square on the neckline of my shirts, the lav mic is much smaller and inconspicuous. The lav mic connects right into the Wireless Go transmitter. The transmitter can then just clip onto some other part of my outfit that is out of the shot.
PA System:
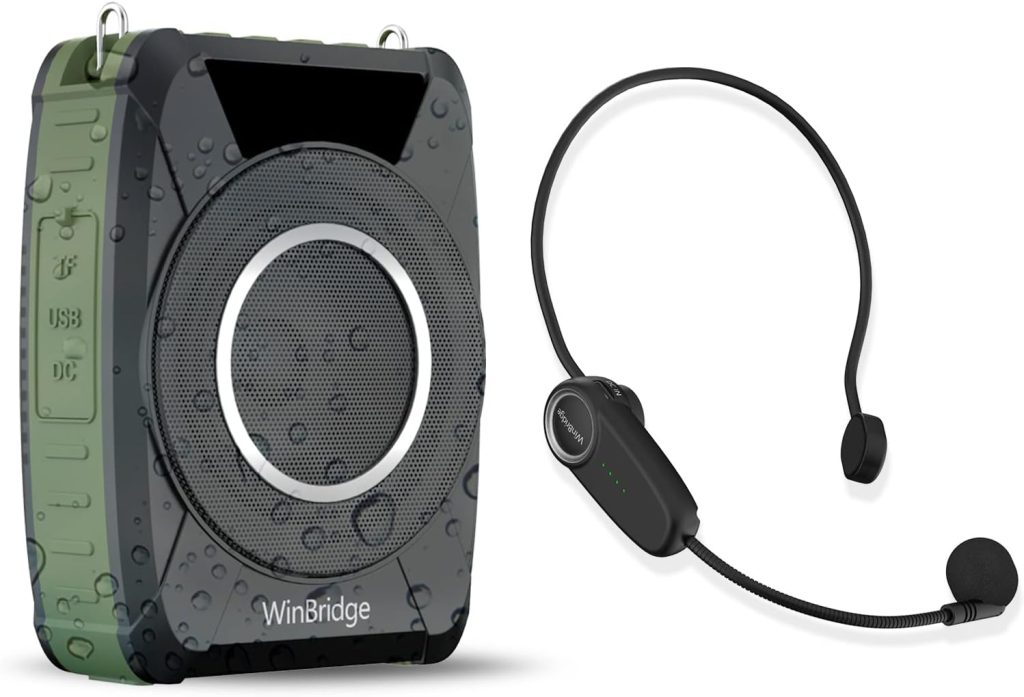
WinBridge Bluetooth 5.0 Voice Amplifier with Wireless Mic Headset, I use this when I am doing high volume headshots, particularly at a conference or when I am doing step and repeats for a long time in a noisy area. This saves my voice so I don’t have to shout. It works surprisingly well for a little system. It has a waterproof Personal Microphone Wireless Voice Amplifier, 20W Loudly Portable Megaphone PA System.
Good To Have On Hand:

I never go on a job without some Gaff tape. you just never know when you are going to need it. Most of the time I use it to mark out where my subjects should stand for headshots by taping off a box around the feet of the first subject that is standing at the right distance from the lights. Take advantage of this roll of black Pro Gaffer Tape from ProTapes, measuring 2″ x 55 yards, to secure overhead lighting cables, audio wire, as well as set and stage decoration. It is also useful for artwork, framing, displays, graphics, and taping power cords down for a safer set. This Pro Gaffer Tape has high tensile strength and a waterproof backing to withstand the elements and a long day of filming. It’s easy to unwind and hand tearable, providing aggressive adhesive without leaving a sticky residue behind on your indoor or outdoor surfaces.
Transportation:
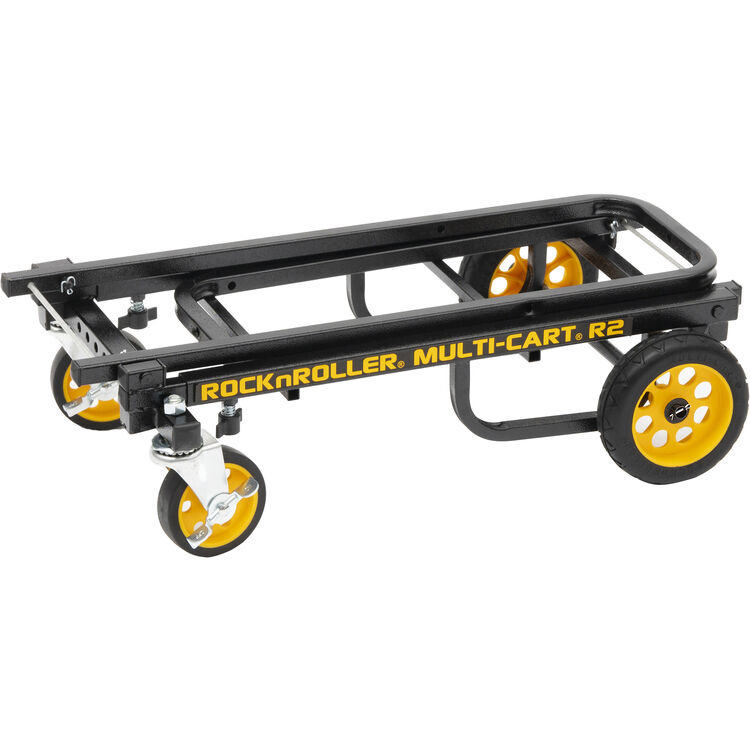
Although highly compact at 26″ in length, which allows for a small footprint and makes it suitable as a travel cart, the black 8-in-1 Equipment Transporter R2RT Micro from RocknRoller Multi-Cart supports up to 350 pounds and expands into eight different configurations. It vastly decreases time and effort when moving huge amounts of equipment. It telescopes from 26-39″ to fit equipment of different sizes and shapes. As far as it being a travel cart, when folded it even fits in airplane overhead bins. Folded to its most compact form, the R2 Micro measures only 26 x 14 x 6.5″.
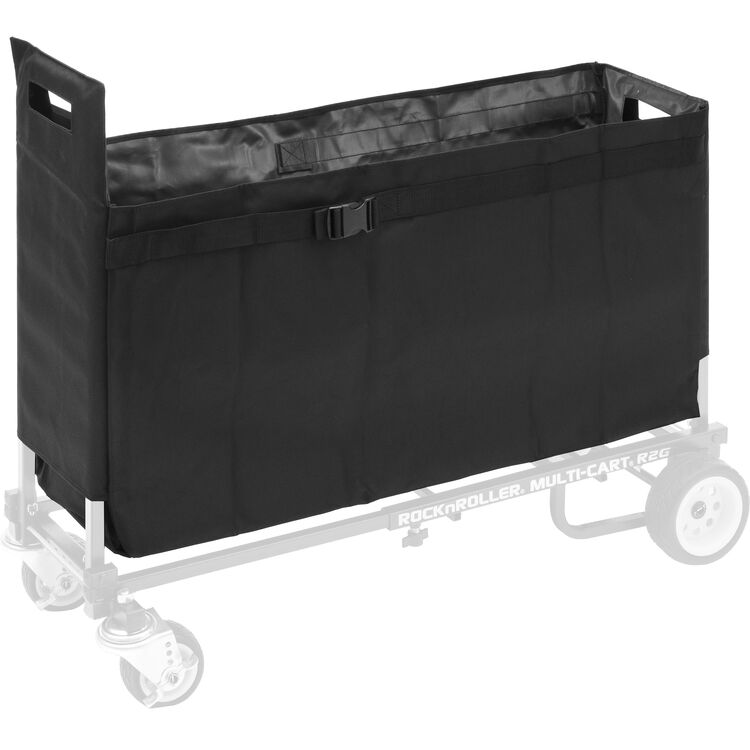
Add extra storage to your R2 MultiCart with the black Wagon Bag. When I get to my location I just slip this bag over my multicart and then fill it with everything I need for my shoot. The bag is constructed from durable 600D polyester, and the removable bag slides over the handles of the cart for easy installation and removal. Adjustable straps are provided to allow the bag to be used when the cart is extended, and with this feature, the cart handles can still be folded down without removing the bag. Additionally, the bag’s straps buckle together around the bottom of the bag to keep everything secure for transport and storage.
Who This Lightweight Photography Gear Is For
Certified Tiny But Mighty™ gear is ideal for:
- Headshot photographers
- Event photographers
- Wedding Photographers
- Travel photographers
- On-location shooters
- Photographers building a minimalist kit
If you’re tired of hauling heavy bags and want portable photography tools that still deliver premium results, this collection was built for you.
The Tiny But Mighty™ Philosophy
Tiny But Mighty™ is about intentional gear choices — not minimalism for the sake of it.
It’s about:
- Carrying less, while producing more
- Choosing compact photography gear that performs at a professional level
- Designing workflows that support longevity, creativity, and ease
Whether it’s gear I design or gear I certify, everything here supports that philosophy.
Affiliate Disclosure (Transparency Always)
Some links on this page are affiliate links. If you purchase through them, I may earn a small commission at no additional cost to you.
Affiliate status never determines certification. Performance does.